Factories > Overview
Warp Factories quickstart
# Warp Factories quickstart :::note Warp Factories is in **Early Access** and available to a limited set of teams. [Request access](https://www.warp.dev/factories/request-access) to use it with your team. ::: A factory is a fleet of agents wired to your software development lifecycle. It connects your repositories and tools to move requests through triage, specification, implementation, review, and verification, while people stay in control of key decisions. You talk to one agent, the **foreman**. It picks up the request from wherever it starts, such as Slack, an issue tracker, or a code host, then dispatches the factory's other agents, each owning one part of the software development lifecycle. In this quickstart, you will create a factory and take one small work item from prompt to pull request in less than 10 minutes. ## What you'll decide Setup connects your code host, selects repositories, names the factory and its foreman, and chooses default agents. You can also connect Slack and an issue tracker now or add them later. Every choice can be changed after setup. ## Prerequisites * **Warp Factories access** - [Request Early Access](https://www.warp.dev/factories/request-access) for your team. * **A Warp team with credits** - The team's [credits](/support-and-community/plans-and-billing/platform-credits/) are consumed by factory agents. * **Repository access** - Authorize GitHub or GitLab during setup. If your organization restricts app installations, ask an owner to approve the connection. ## Set up your factory _~5 minutes_ :::note An agent connected to [Factory MCP](/factories/factory-mcp/#set-up-with-your-coding-agent) can run this whole setup: ask it to set up a factory, and it walks you through the same choices as the wizard. If this wizard is still open when the agent finishes, refresh the page to see the new factory. ::: Warp walks you through a setup wizard: 1. Sign in to the <a href=https://platform.warp.dev>Warp Factories web app</a>. Next to **Factories**, click **+**. <figure style={{ maxWidth: "300px" }}>  <figcaption>Click + next to Factories to open the setup wizard.</figcaption> </figure> 2. Click **I want to use repos from GitHub** or **I want to use repos from GitLab**, then choose the organization or group to connect. <figure style={{ maxWidth: "563px" }}>  <figcaption>Choose the organization or group whose repositories the factory will use. GitLab shows an equivalent screen for groups.</figcaption> </figure> 3. On **Select your repos**, select the repositories the factory works in, then click **Add repos**. Start with one or two repositories that ship together, and add more later. See [sizing a factory](/factories/#sizing-a-factory) before adding a repository another factory already covers. <figure style={{ maxWidth: "563px" }}>  <figcaption>Search for and select the repositories the factory works in.</figcaption> </figure> 4. Name the factory. This also sets its [**Foreman name**](/factories/factory-agents/#foreman-name), the handle your team @-mentions in Slack and Linear. The factory and foreman names match by default, but the foreman is the agent that coordinates its work. <figure style={{ maxWidth: "563px" }}>  <figcaption>Name the factory and, optionally, add a description and avatar.</figcaption> </figure> 5. Toggle the agents the foreman can dispatch: **Triage**, **Spec**, **Implement**, and **Review**. All four start enabled. Leave **Implement** on so this quickstart can end in a pull request. See [factory agents](/factories/factory-agents/) for details. <figure style={{ maxWidth: "563px" }}>  <figcaption>Toggle which default agents the foreman can dispatch.</figcaption> </figure> 6. Optionally connect Slack and an issue tracker so teammates can hand work to the factory from the tools they already use. You can add either later from [connect your factory](/factories/connect-your-factory/). Warp creates the factory and opens its [dashboard](/factories/factory-dashboard/). ## Send your first work item _~5 minutes_ Send work from Slack or an issue tracker. If you skipped integrations, start a run from the **Runs** page of the factory's [dashboard](/factories/factory-dashboard/). 1. Describe one small, verifiable change and send it: ```text title="Example first request" Add a "Local development" section to README.md that summarizes the setup steps from CONTRIBUTING.md. Keep the change to that one file, run the repo's lint check, and open a pull request. ``` Name the file, expected change, and verification command. 2. The foreman dispatches the agents needed for the request and posts progress where it started. Follow the foreman and child runs on the factory's [Runs page](/factories/factory-dashboard/#inspect-runs). Requests for input also appear in your [inbox](/factories/factory-inbox/). If you connected Slack, you can follow along there instead: <figure style={{ maxWidth: "563px" }}>  <figcaption>The factory's Slack app posting progress updates back in the thread where you sent the request.</figcaption> </figure> 3. When the Implement agent finishes, review and merge the linked pull request as you would any other. ## Next steps * [**Connect your factory**](/factories/connect-your-factory/) - Configure intake sources. * [**Factory MCP**](/factories/factory-mcp/) - Send work from a coding agent or MCP client. * [**How Warp Factories work**](/factories/how-factories-work/) - Understand the work-item lifecycle. * [**warp-factory-examples**](https://github.com/warpdotdev/warp-factory-examples) - Complete working definitions to copy, from a single-repo quickstart to the full issue-to-PR lifecycle. * [**Troubleshooting Warp Factories**](/factories/troubleshooting/) - Fix common setup and run issues.Tell me about this feature: https://docs.warp.dev/factories/quickstart/Set up a factory, connect your repositories, and take your first work item from prompt to pull request in less than 10 minutes.
A factory is a fleet of agents wired to your software development lifecycle. It connects your repositories and tools to move requests through triage, specification, implementation, review, and verification, while people stay in control of key decisions. You talk to one agent, the foreman. It picks up the request from wherever it starts, such as Slack, an issue tracker, or a code host, then dispatches the factory’s other agents, each owning one part of the software development lifecycle.
In this quickstart, you will create a factory and take one small work item from prompt to pull request in less than 10 minutes.
What you’ll decide
Section titled “What you’ll decide”Setup connects your code host, selects repositories, names the factory and its foreman, and chooses default agents. You can also connect Slack and an issue tracker now or add them later. Every choice can be changed after setup.
Prerequisites
Section titled “Prerequisites”- Warp Factories access - Request Early Access for your team.
- A Warp team with credits - The team’s credits are consumed by factory agents.
- Repository access - Authorize GitHub or GitLab during setup. If your organization restricts app installations, ask an owner to approve the connection.
Set up your factory
Section titled “Set up your factory”~5 minutes
Warp walks you through a setup wizard:
-
Sign in to the Warp Factories web app. Next to Factories, click +.
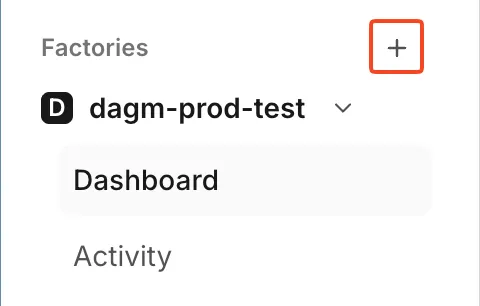
Click + next to Factories to open the setup wizard. -
Click I want to use repos from GitHub or I want to use repos from GitLab, then choose the organization or group to connect.
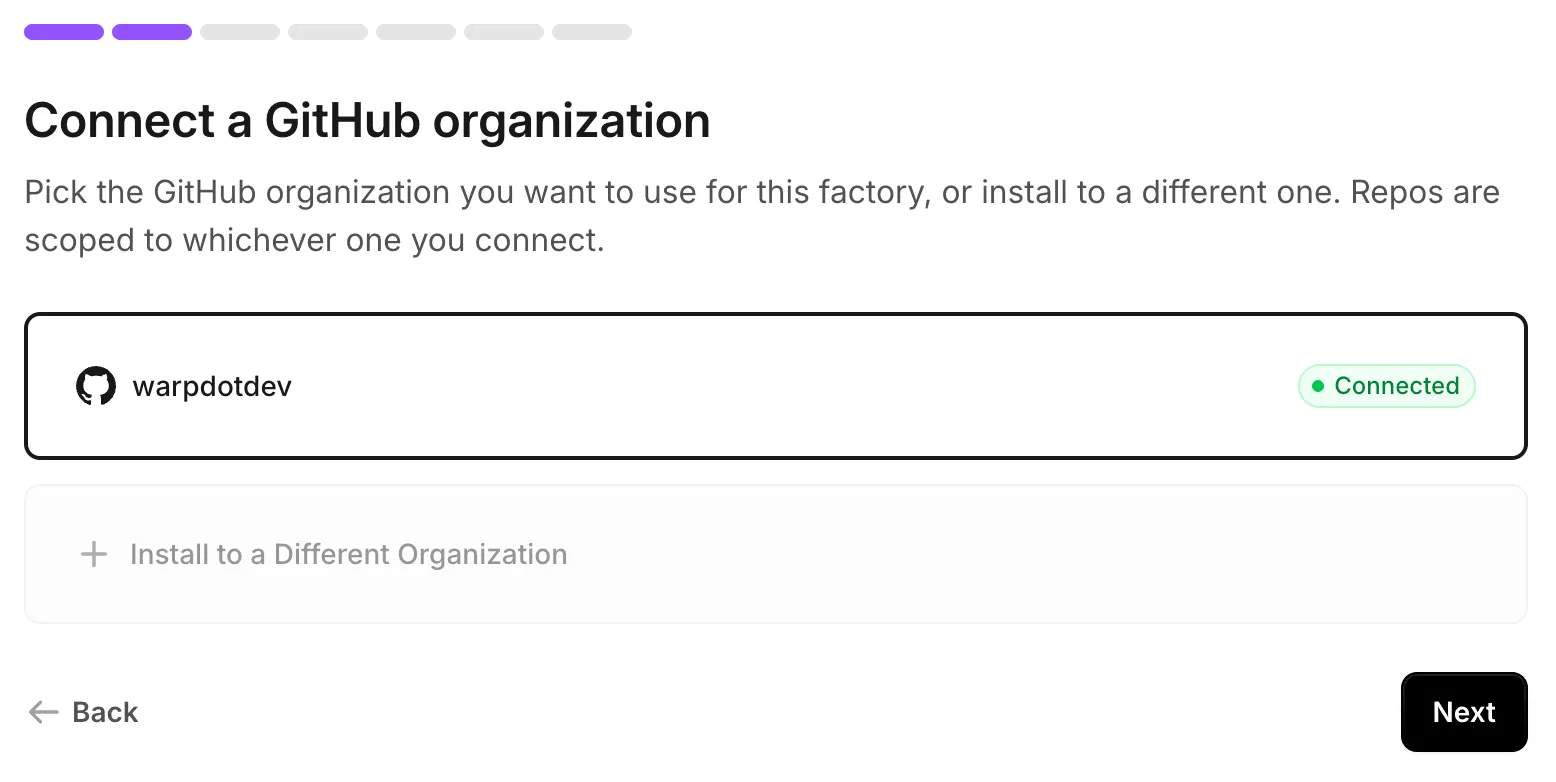
Choose the organization or group whose repositories the factory will use. GitLab shows an equivalent screen for groups. -
On Select your repos, select the repositories the factory works in, then click Add repos. Start with one or two repositories that ship together, and add more later. See sizing a factory before adding a repository another factory already covers.
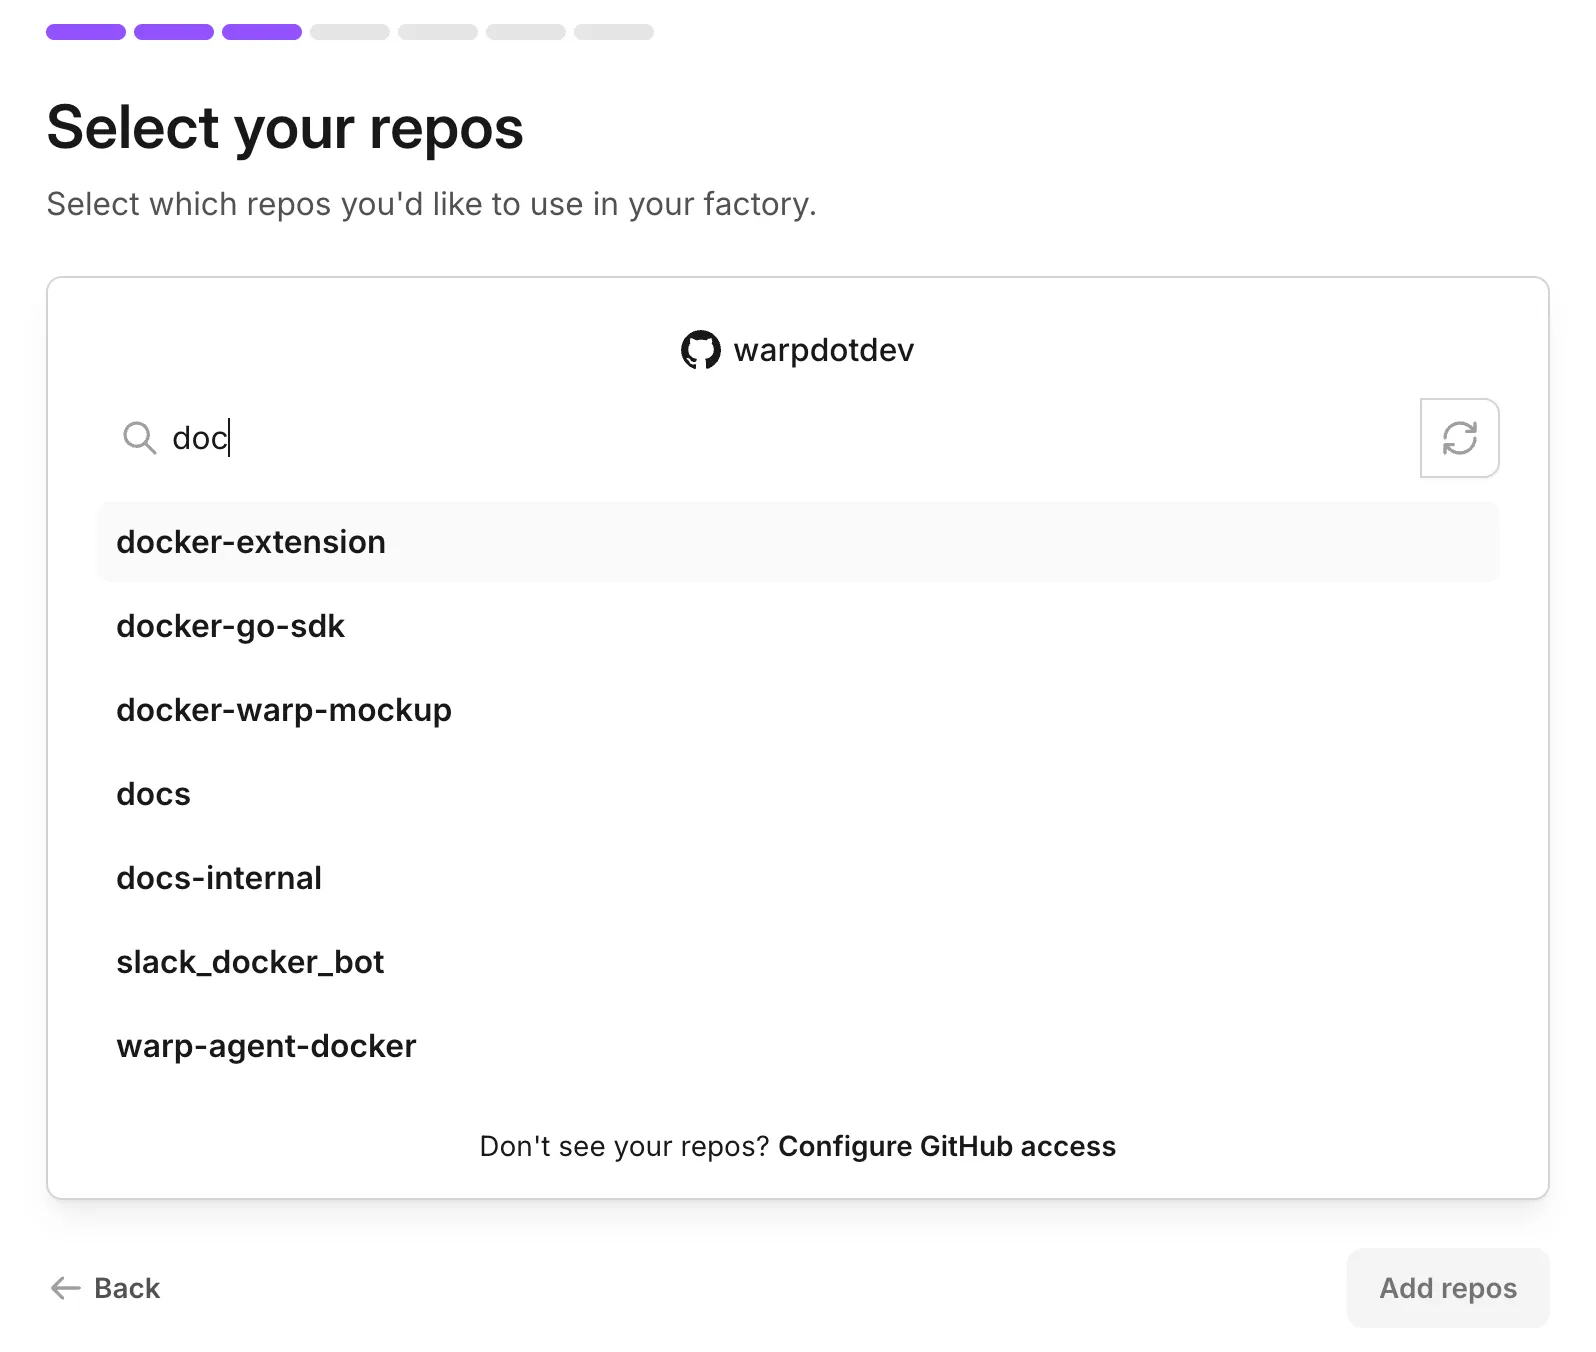
Search for and select the repositories the factory works in. -
Name the factory. This also sets its Foreman name, the handle your team @-mentions in Slack and Linear. The factory and foreman names match by default, but the foreman is the agent that coordinates its work.
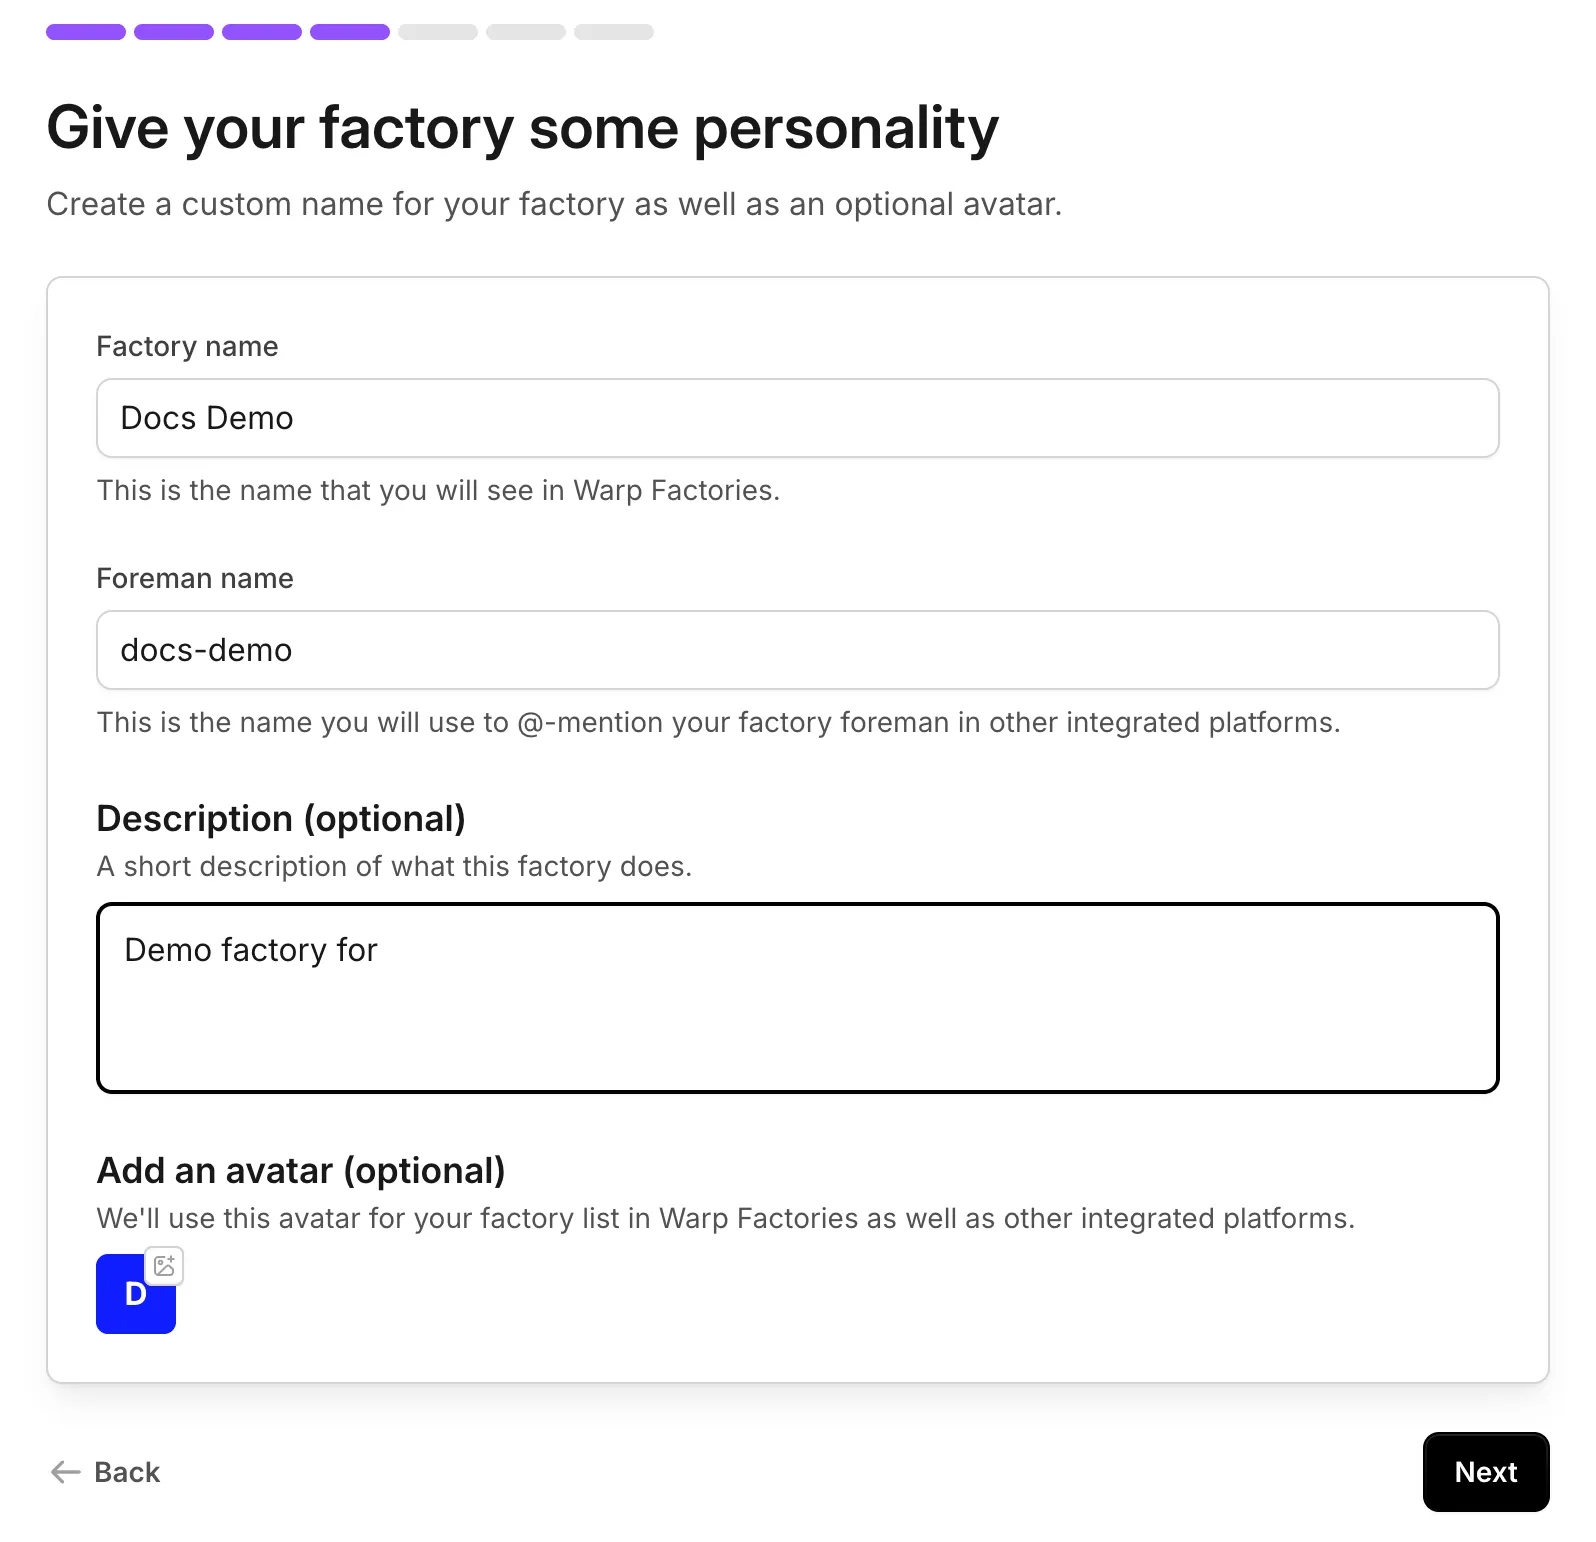
Name the factory and, optionally, add a description and avatar. -
Toggle the agents the foreman can dispatch: Triage, Spec, Implement, and Review. All four start enabled. Leave Implement on so this quickstart can end in a pull request. See factory agents for details.
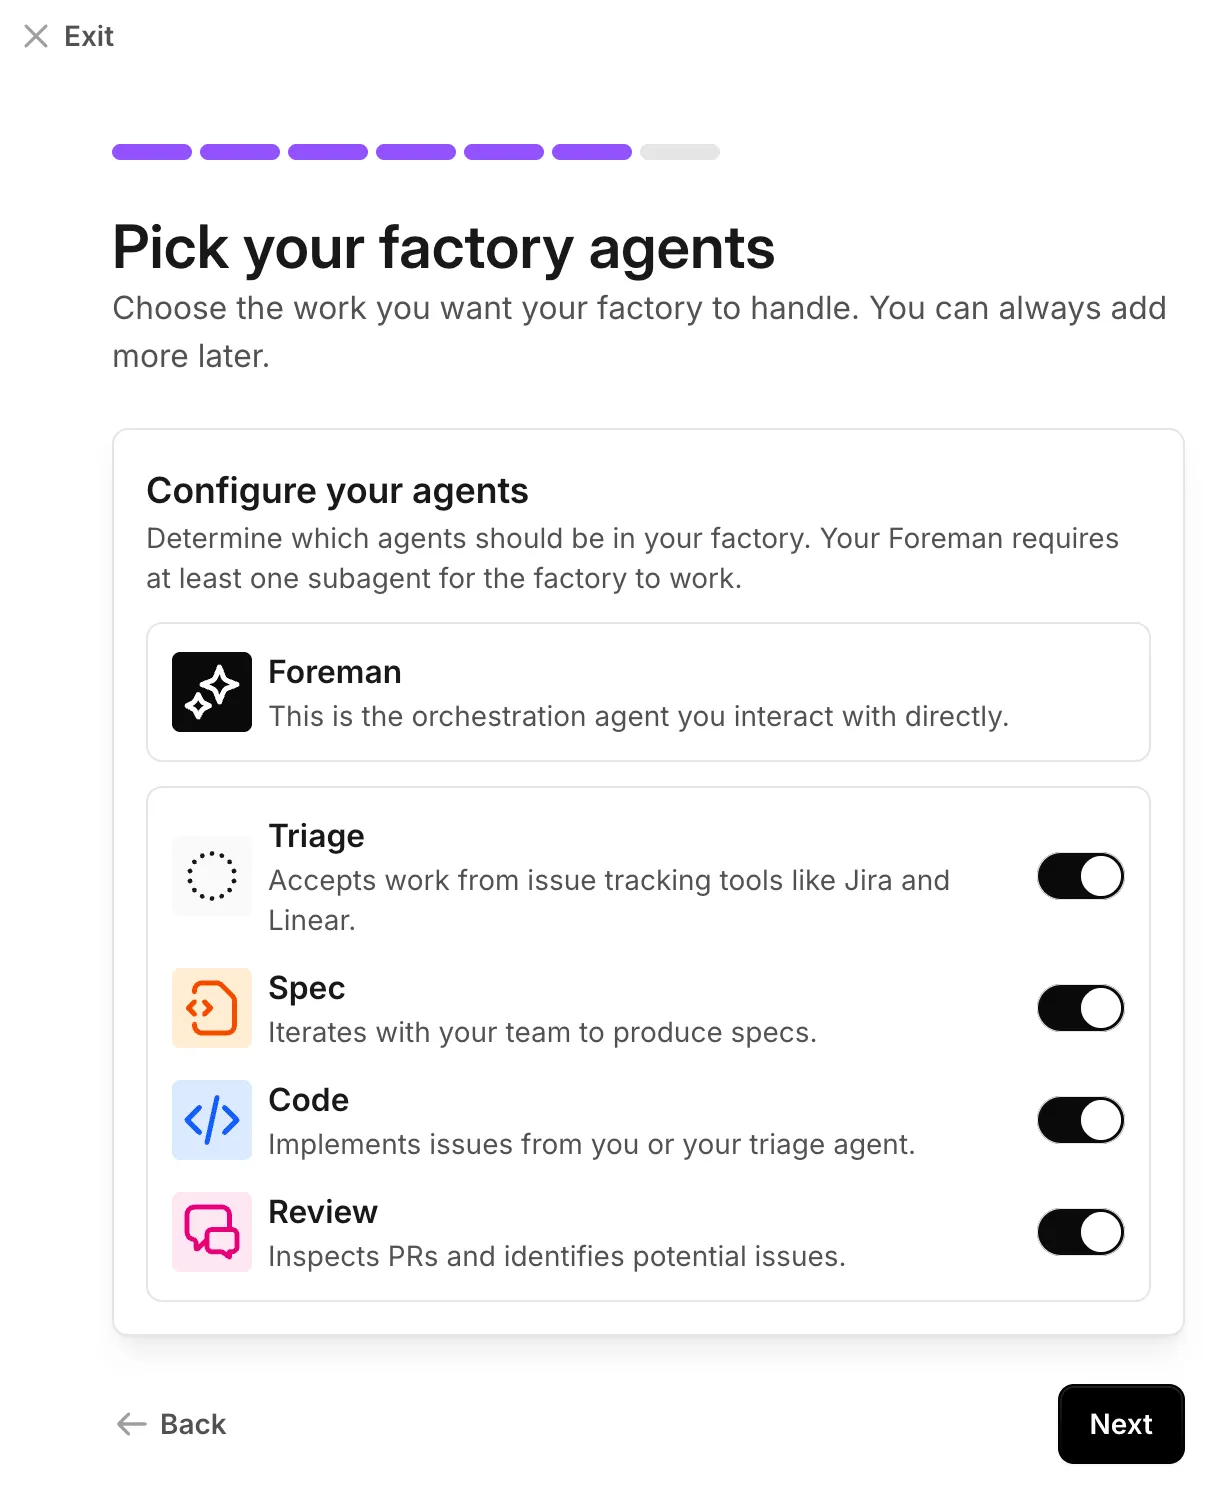
Toggle which default agents the foreman can dispatch. -
Optionally connect Slack and an issue tracker so teammates can hand work to the factory from the tools they already use. You can add either later from connect your factory.
Warp creates the factory and opens its dashboard.
Send your first work item
Section titled “Send your first work item”~5 minutes
Send work from Slack or an issue tracker. If you skipped integrations, start a run from the Runs page of the factory’s dashboard.
-
Describe one small, verifiable change and send it:
Example first request Add a "Local development" section to README.md that summarizes the setupsteps from CONTRIBUTING.md. Keep the change to that one file, run therepo's lint check, and open a pull request.Name the file, expected change, and verification command.
-
The foreman dispatches the agents needed for the request and posts progress where it started. Follow the foreman and child runs on the factory’s Runs page. Requests for input also appear in your inbox.
If you connected Slack, you can follow along there instead:
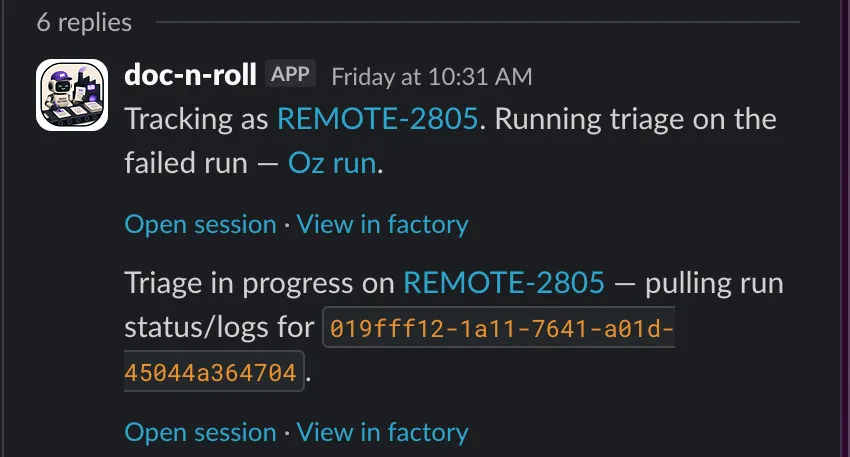
The factory’s Slack app posting progress updates back in the thread where you sent the request. -
When the Implement agent finishes, review and merge the linked pull request as you would any other.
Next steps
Section titled “Next steps”- Connect your factory - Configure intake sources.
- Factory MCP - Send work from a coding agent or MCP client.
- How Warp Factories work - Understand the work-item lifecycle.
- warp-factory-examples - Complete working definitions to copy, from a single-repo quickstart to the full issue-to-PR lifecycle.
- Troubleshooting Warp Factories - Fix common setup and run issues.